How to Upgrade Your Server Plan
💡 Why upgrade?
Sometimes your server may start to feel a bit limited — maybe you want to support more players, expand your world, or install heavy mods.
In that case, upgrading to a more powerful plan is a smart move!
🔐 Step 1 – Log in to the customer area
Go to my.oxy.games and log in with your account.
📌 Can’t log in or forgot your password?
Check our guide:
Forgot your password?
🤔 New to my.oxy.games? Get a quick overview:
Customer Area Guide
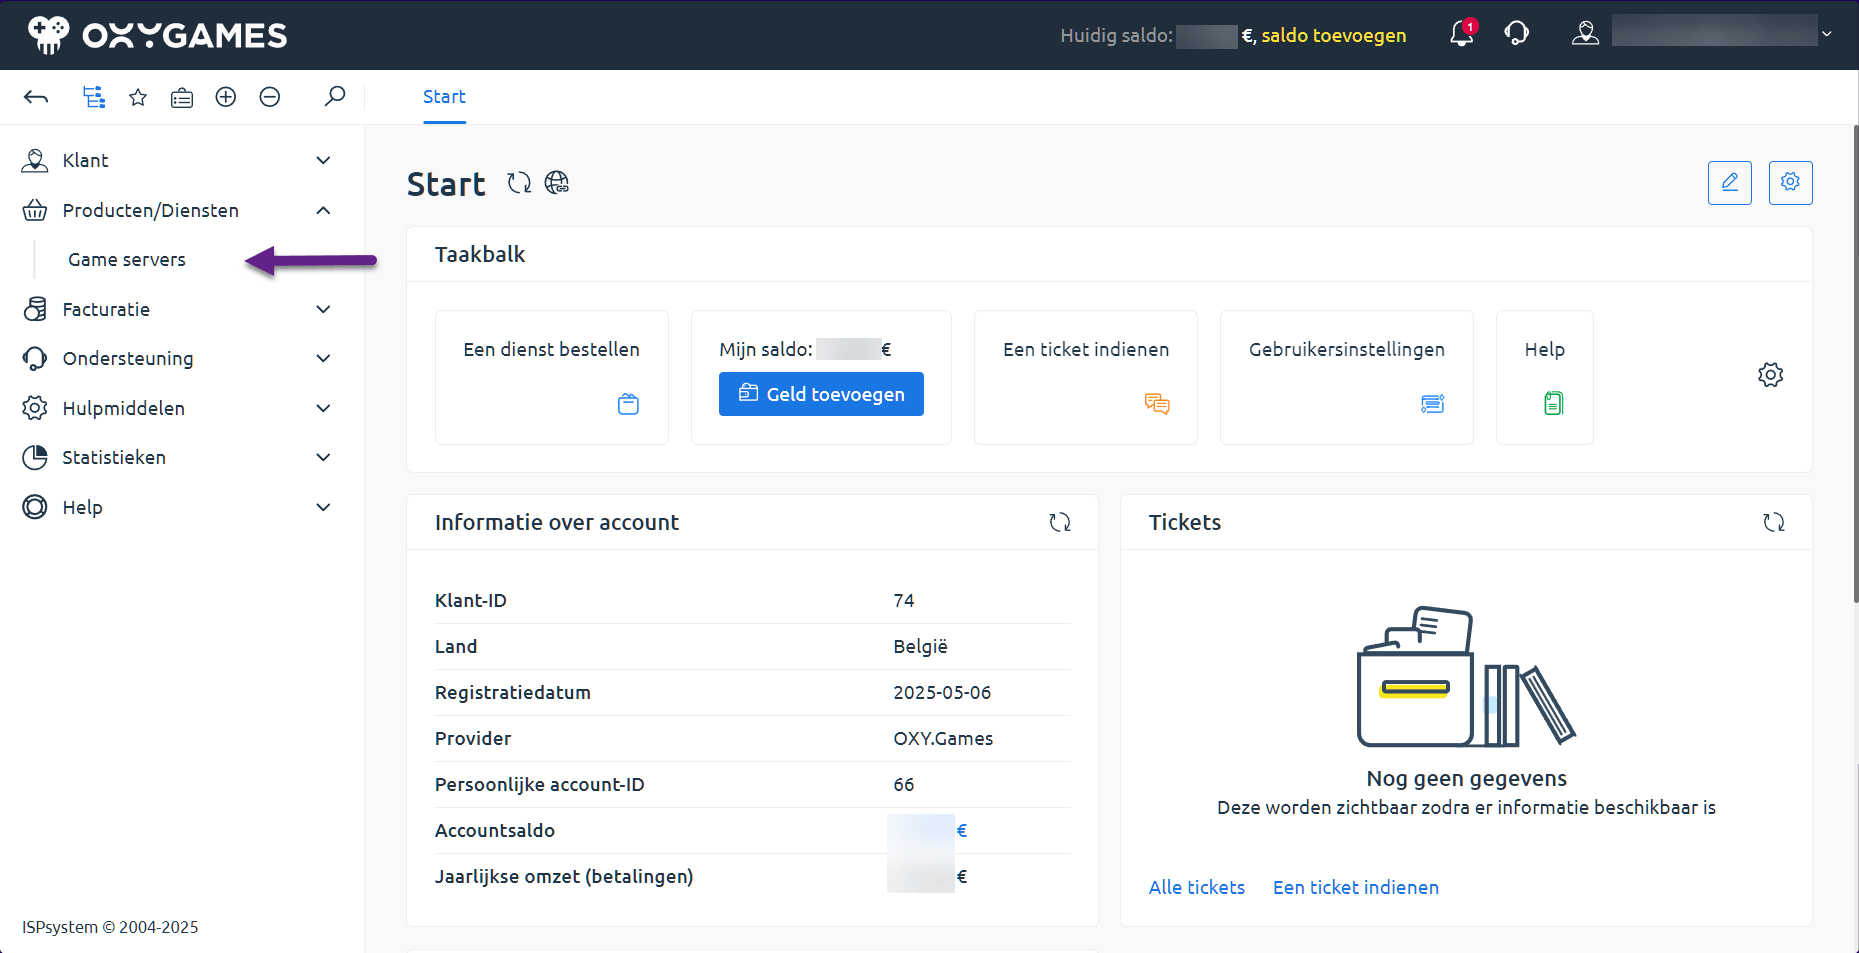
🧭 Step 2 – Go to your game servers
In the left menu, click Products/Services > Game Servers
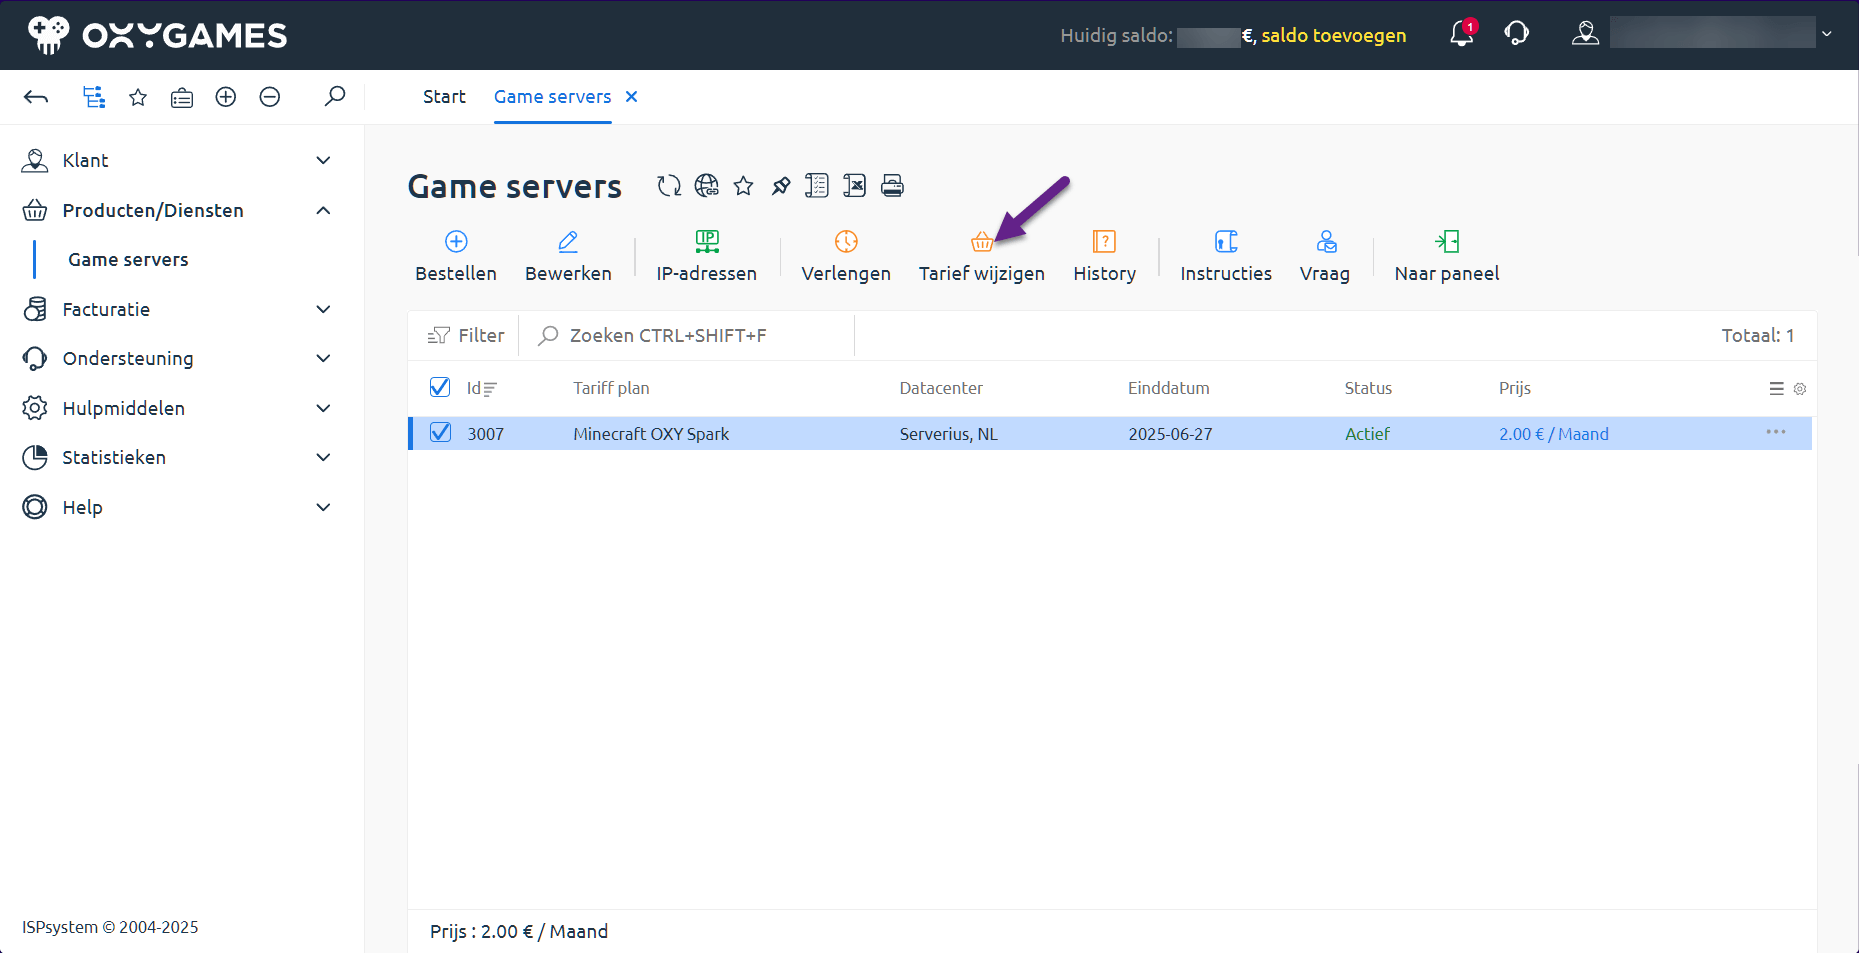
🖱️ Step 3 – Select your server
In the overview, find your active servers. Select the correct one and click the Change Plan button.
⚙️ Step 4 – Choose a new plan
If an upgrade is possible (you’re not already on the highest plan), you’ll see a screen like this:
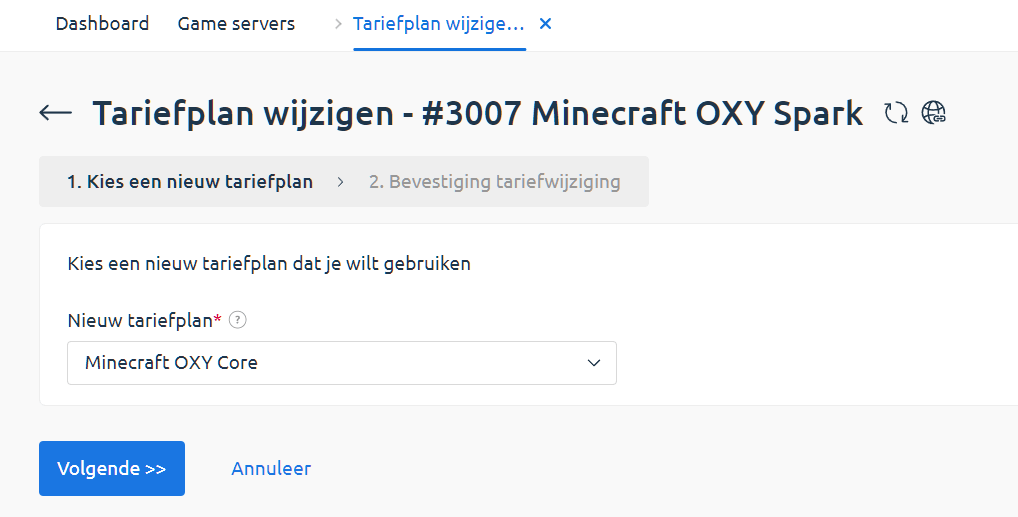
Select your desired plan from the dropdown menu.
📊 Want to know the specs of each plan?
Check our pricing page:
Minecraft Server Plans
Then click Next >>.
✅ Step 5 – Confirm the upgrade
You’ll now see a summary showing the price difference and how much you need to pay.
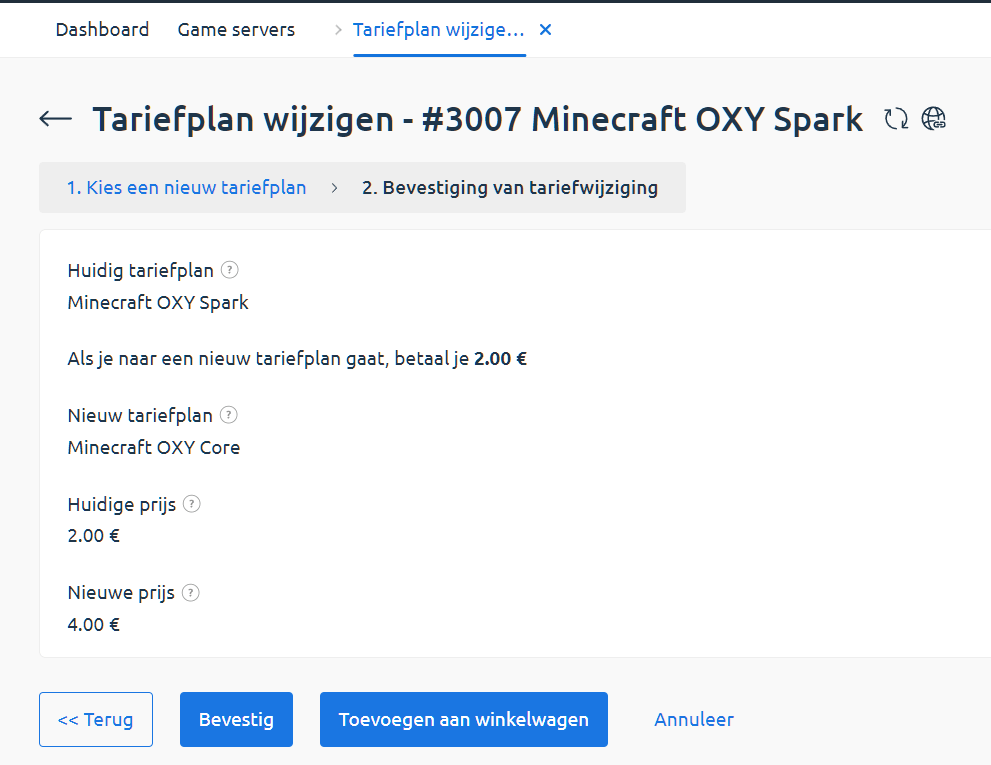
Click Confirm if everything looks good.
💸 Don’t have enough balance?
Add funds first:
Add Balance
The upgrade is usually applied within a few seconds.
🔁 Step 6 – Restart your server
After upgrading, it’s important to restart your server from the control panel so the new resources take effect.
👉 Guide: Start or Stop Your Server
🤔 Need help?
Feel free to contact us
Or read: How to Submit a Support Ticket